Buttons, Interrupts, and Functions in BIPES
Overview
In this lab, we will continue to use BIPES to make the blue on-board LEDs on the Maker Pi blink on and off every quarter second. The only things you need to run this program are
- BIPES
- a USB cable
- a Maker Pi RP2040 microcontroller
Creating a function to blink an LED
We want ot take advantage of BIPES ability to allow us to define our own functions. So we will use that to create a function to turn an LED on, wait a predetermined amount of time (delay), then turn the LED off, and again wait that same time before return to the calling program.

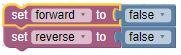
Creating sequence variables to control direction
Next, let's create a pair of variables to determine which direction the LEDs will sequence, forwards or backwards. Initially, we don't want to have the LEDs blink at all, so we'll set the variables to false.
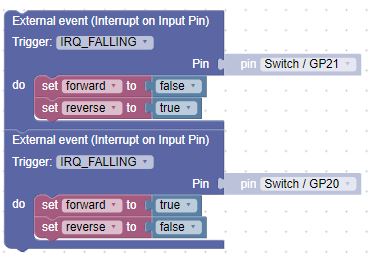
Adding interrupts to capture button presses
Then, we can set up a pair of interrupts to capture when a button is pressed on the Maker Pi board, indicating the direction to sequence the LEDs.
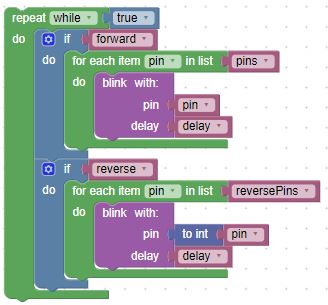
The main loop
And finally, the main loop. It is similar to the previous example; however, there are two added if blocks to determine the sequence direction.
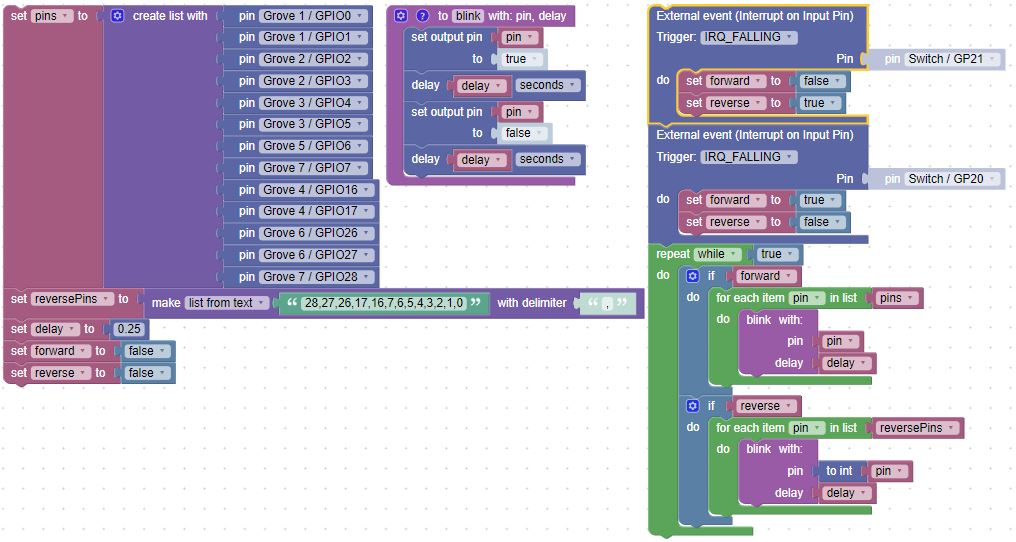
The entire set of blocks
Putting it all together allows us to sequence the LEDs in one direction, once one button is pressed, then sequence in the opposition direction when the other button is pressed.
Challenge
Can you make the sequence change direction in the middle of a run, rather than waiting for the sequence to complete?