Thonny Python IDE
A lightweight Python integrated development environment (IDE) that is ideal for beginners writing simple Python programs for first-time users. It has been modified to work well with the Raspberry Pi Pico. It supports different ways of stepping through the code, step-by-step expression evaluation, detailed visualization of the call stack and a mode for explaining the concepts of references and heap.
We strongly suggest that classes begin with Thonny for the first several weeks. As students want to do more complex functions such as build automatic deployment scripts other IDEs are more appropriate.
Thonny 3.3.3 (2021-01-21) was the first version to support the Raspberry Pi Pico. There have also been several enhancements since that release. For a release history, see the Thonny Release History. We suggest checking this link monthly for updates.
Installing Thonny
The best way to install Thonny is to go to the Thonny website an look for the "Download" area for your operating system. That link is here:
Make sure you upgrade to the latest version of Thonny if you already have a Thonny installed on your computer.
You can find more tips on getting started with Thonny on the Raspberry Pi website:
https://projects.raspberrypi.org/en/projects/getting-started-with-the-pico/2
Thonny runs on Mac, Windows and Linux.
Upgrading Thonny
Although you can always upgrade Thonny by removing it and reinstalling a new version, on Mac and Linux systems there is an easier method.
Run the following shell command:
1 | |
or
1 | |
Running help()
You can enter the help() function in the main script area and then press the Play button. This will tell you
1 2 3 4 5 6 7 8 9 10 11 12 13 14 15 16 17 18 19 20 21 22 23 24 25 26 27 28 29 30 31 32 33 34 35 36 37 38 | |
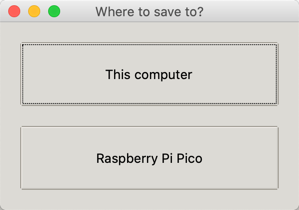
Save Options
You can save a python file in Thonny to either the Pico or to your local computer's file system.
first stop execution of any program you are running.
Downloading the Firmware
After you start up Thonny there will be a button in the lower right corner.
After you click on it you will see the following:
1 2 3 4 5 6 7 | |
Version
After you press play the following will appear in the console.
1 2 3 | |
Plotting Values on Thonny
If you are reading sensor values and want to see a nice plot of the values, you can use Thonny's Plot function to view the values. Simply add numeric print values to your main loop and they will be displayed in the plot window. This is very useful for any analog to digital conversions and can be used as a simple tool to view anomalies in incoming data. For example if you accidentally hook up a potentiometer's positive rail to 3.3OUT instead of the 3.3REF you will see noise in the incoming data caused by spikes on the power rails.
Background on Thonny
MicroPython was originally developed by Damien George and first released in 2014. However, MicroPython did not have a development environment that was easy for students to use. Thonny was developed to provide an easy to use tool just for MicroPython development. Thonny was created at the University of Tartu Institute of Computer Science in Estonia for this purpose. They continue to support Thonny.
Several feature for Thonny were sponsored by the Raspberry Pi Foundation and we continue to see a close relationship between the Raspberry Pi Foundation and the Thonny development team.