Skip to content

Larson Scanner Pumpkin

Larson Scanner Cylon Pumpkin

The Larson Scanner is a light pattern special effect named after Glen A. Larson. Larson used this pattern to give his Battlestar Galactica Cylon and KITT robot eyes a sense of sentience. See Knight Rider for the backstory.

This project uses a 144 pixel/meter LED strip and a Raspberry Pi Pico to produce this effect.

Craft Pumpkin 
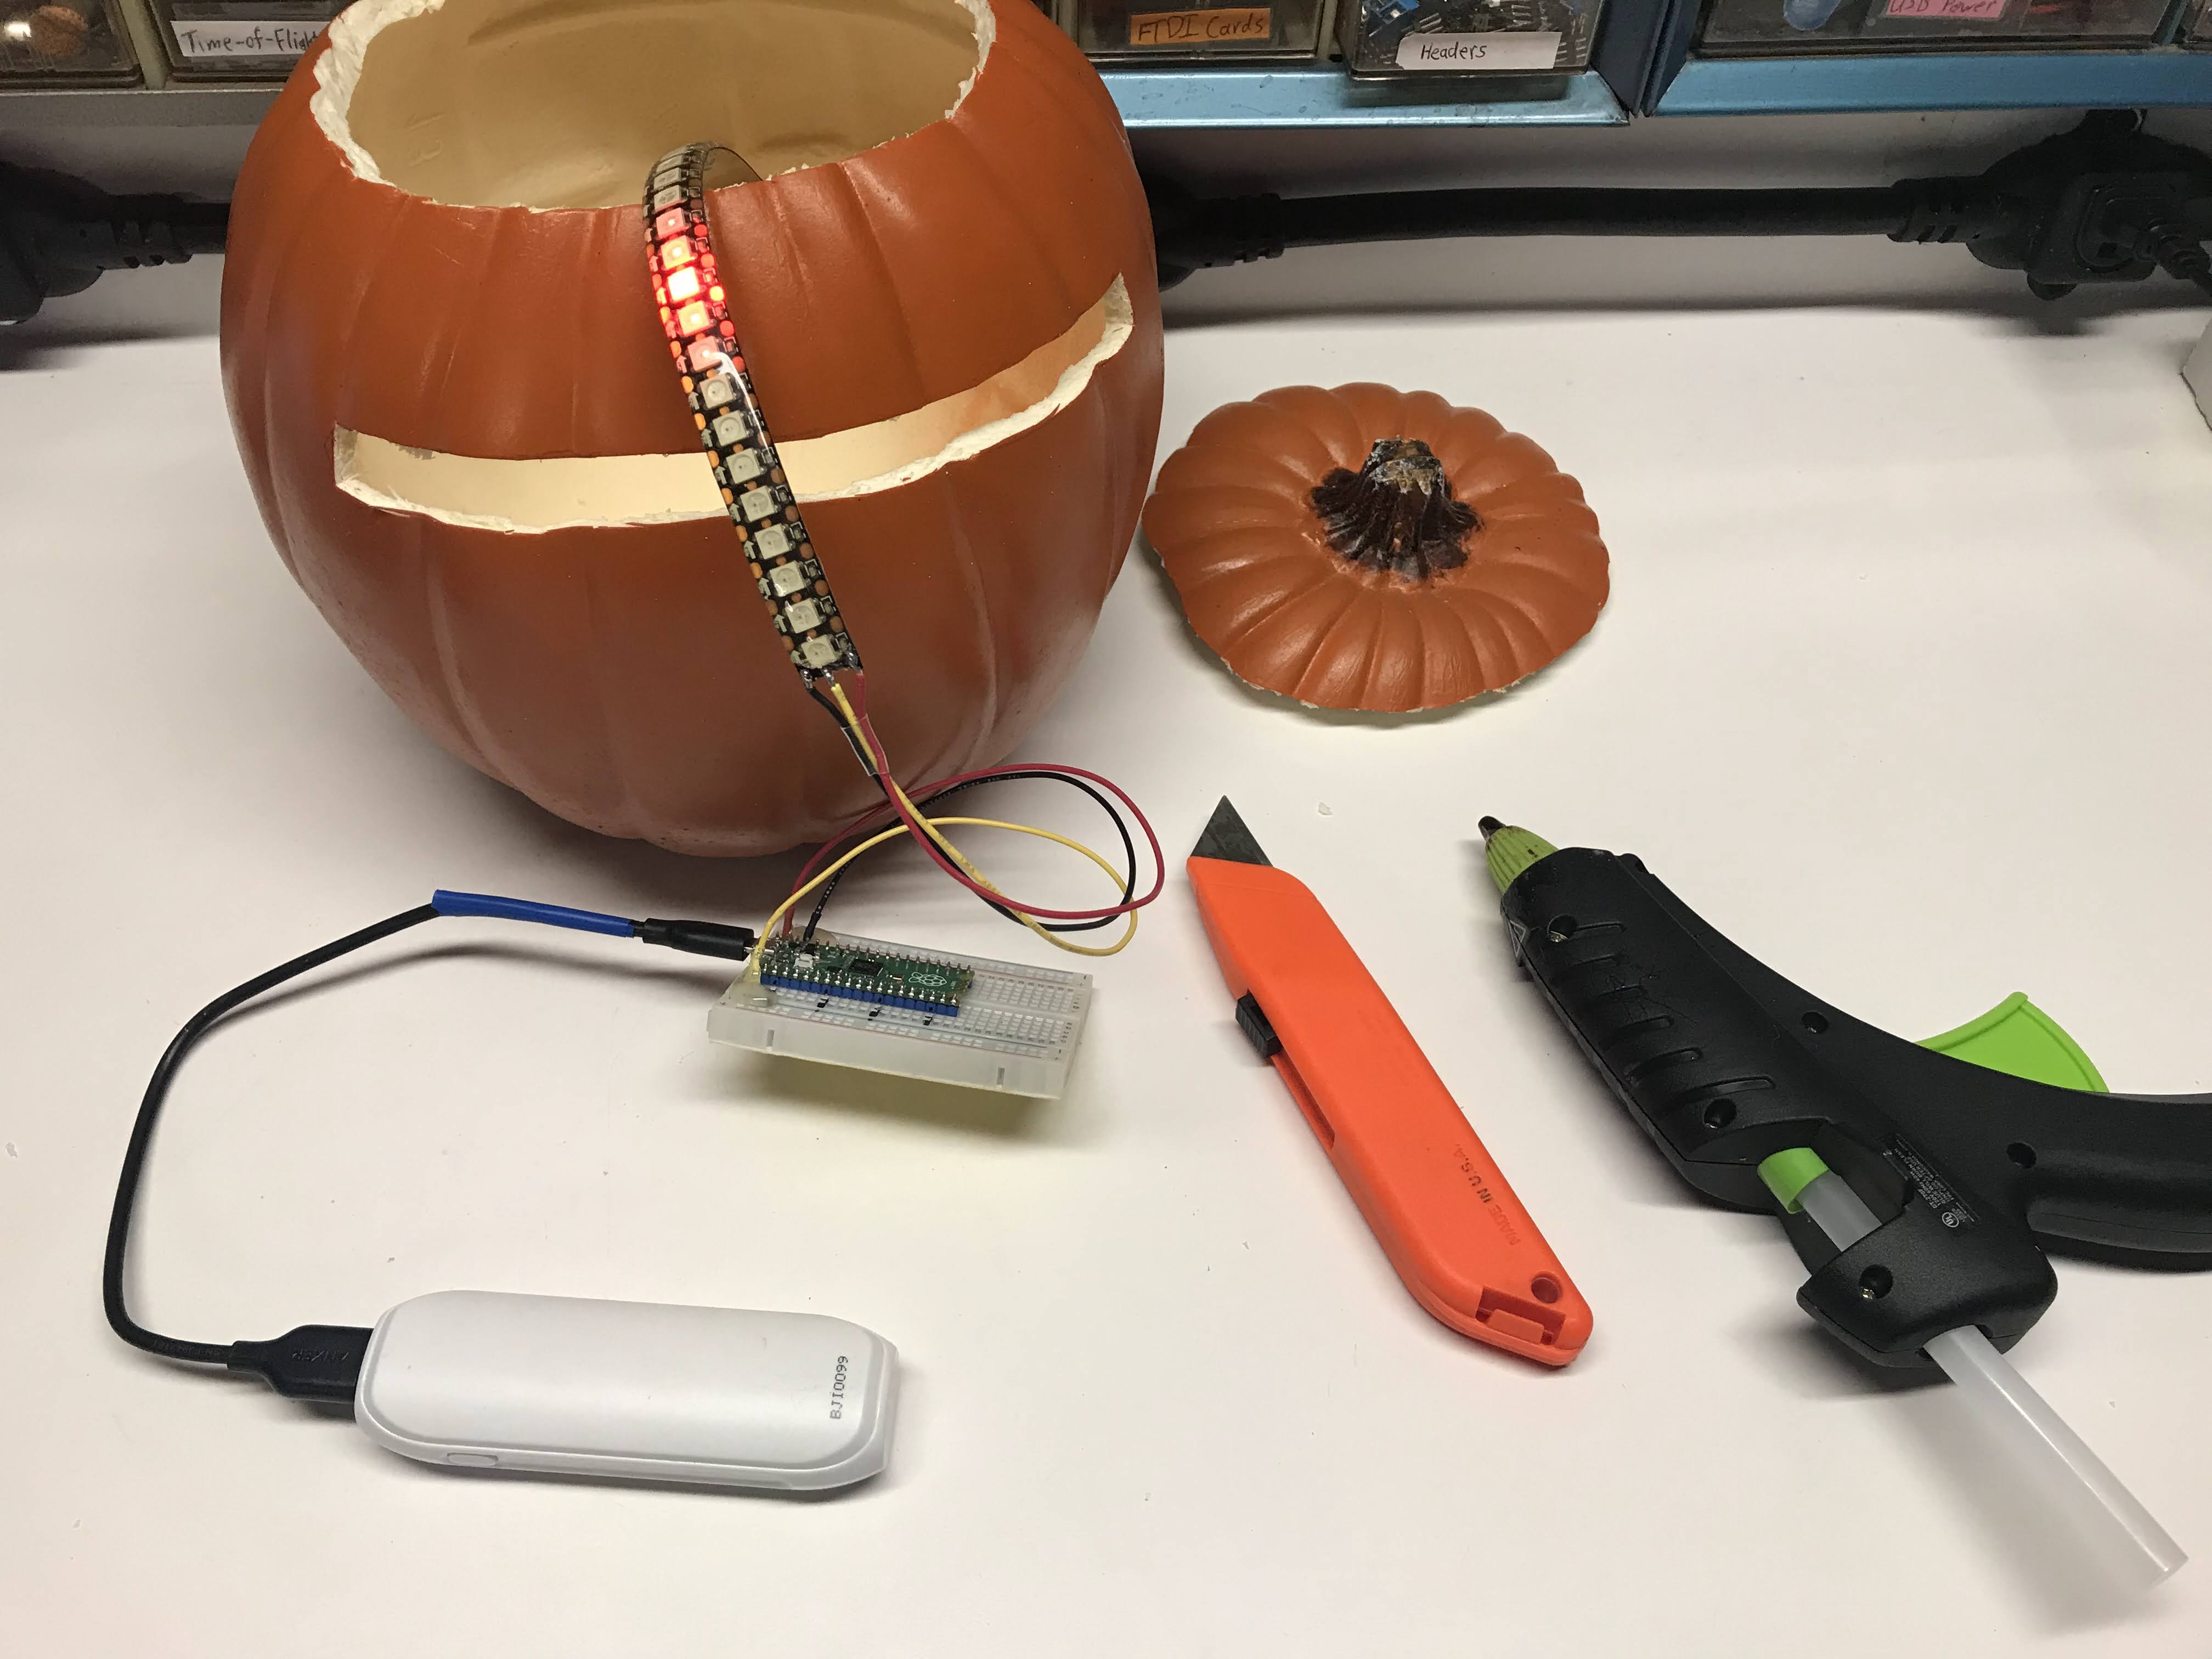
I used a craft pumpkin from Michaels. I cut a slit in it and used hot-glue to hold the LED strip in place.

Parts List

  1. 9" Craft Pumpkin from Micheals $10
  2. Raspberry Pi Pico ($4)
  3. Breadboard ($2)
  4. 27 pixels of WS2811B NeoPixel Strip 144 pixels per meter preferred ($8)
  5. 3 AA battery pack or a USB battery pack

WS2811b 144 
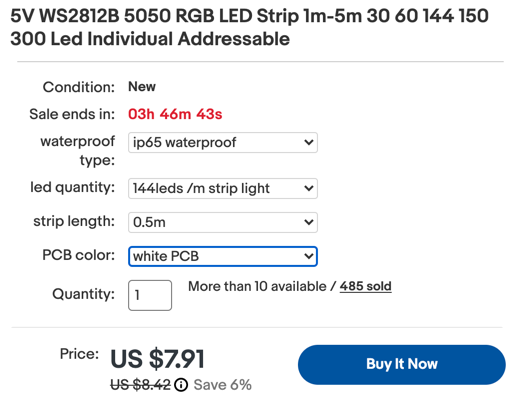
This is a screen image from e-bay showing a 1/2 meter of LED strip for $8.

Sample Code

This code shows a five-pixel wide "eye" moving back-an-forth over a 27 pixel strip. There is a central bright red LED surrounded by dimmer red LEDs that move back-and-forth. We are using the NeoPixel library supplied by Blaž Rolih.

The example below has a delay of 1/10th of a second between drawing events. You can make the delay smaller to speed up the speed of the eye movement.

 1
 2
 3
 4
 5
 6
 7
 8
 9
10
11
12
13
14
15
16
17
18
19
20
21
22
23
24
25
26
27
28
29
30
31
32
33
34
35
36
from utime import sleep
# We are using https://github.com/blaz-r/pi_pico_neopixel
from neopixel import Neopixel

NUMBER_PIXELS = 27
STATE_MACHINE = 0
LED_PIN = 0

strip = Neopixel(NUMBER_PIXELS, STATE_MACHINE, LED_PIN, "GRB")

# Color RGB values
red = (255, 0, 0)
red_med = (32, 0, 0)
red_light = (8, 0, 0)
off = (0,0,0)

delay = .1
while True:
    for i in range(2, NUMBER_PIXELS-2):
        strip.set_pixel(i-2, red_light)
        strip.set_pixel(i-1, red_med)
        strip.set_pixel(i, red)
        strip.set_pixel(i+1, red_med)
        strip.set_pixel(i+2, red_light)
        if i > 0: strip.set_pixel(i-3, off)
        strip.show()
        sleep(delay)
    for i in range(NUMBER_PIXELS-4, 1, -1):
        if i < NUMBER_PIXELS-2: strip.set_pixel(i+3, off)
        strip.set_pixel(i-2, red_light)
        strip.set_pixel(i-1, red_med)
        strip.set_pixel(i, red)
        strip.set_pixel(i+1, red_med)
        strip.set_pixel(i+2, red_light)
        strip.show()
        sleep(delay)

Adding Some Color

The pattern above is faithful to the original Cylon robot pattern, but to be honest, it is a little boring. We can spruce it up a bit by adding some color and the comet-tail pattern.

This program cycles through a "moving rainbow" pattern and then the comet pattern for 10 colors.

 1
 2
 3
 4
 5
 6
 7
 8
 9
10
11
12
13
14
15
16
17
18
19
20
21
22
23
24
25
26
27
28
29
30
31
32
33
34
35
36
37
38
39
40
41
42
43
44
45
46
47
48
49
50
51
52
53
54
55
56
57
58
59
60
61
62
63
64
65
66
67
68
69
70
71
72
73
74
75
76
77
78
79
80
81
82
83
84
85
86
from utime import sleep
# We are using https://github.com/blaz-r/pi_pico_neopixel
from neopixel import Neopixel

NUMBER_PIXELS = 25
STATE_MACHINE = 0
LED_PIN = 0

# The Neopixels on the Maker Pi RP2040 are the GRB variety, not RGB
strip = Neopixel(NUMBER_PIXELS, STATE_MACHINE, LED_PIN, "GRB")

# Color RGB values
red = (255, 0, 0)
off = (0,0,0)
orange = (255, 60, 0) # Gamma corrected from G=128 to be less like yellow
yellow = (255, 150, 0)
green = (0, 255, 0)
blue = (0, 0, 255)
cyan = (255, 0, 255)
indigo = (75, 0, 130) # purple?
violet = (138, 43, 226) # mostly pink
color_names = ('red', 'orange', 'yellow', 'green', 'blue', 'indigo', 'violet')
num_colors = len(color_names)
colors = (red, orange, yellow, green, blue, indigo, violet)

# set to be 1 to 100 for percent brightness
strip.brightness(100)

def draw_eye_7(r, g, b):
    for i in range(6, NUMBER_PIXELS): 
        strip.set_pixel(i, (r, g, b))
        # step back from the current to 6 back halfing the intensity each time
        for j in range(0,7):
            strip.set_pixel(i-j, (int(r/pow(2,j)), int(g/pow(2,j)), int(b/pow(2,j))))
        if i > 6: strip.set_pixel(i-7, (0,0,0))
        strip.show()
        sleep(delay)
        strip.set_pixel(i, off)
    for i in range(NUMBER_PIXELS-6, 0, -1):
        strip.set_pixel(i, (r, g, b)) 
        for j in range(7,0):
            strip.set_pixel(i+j, (int(r/pow(2,j)), int(g/pow(2,j)), int(b/pow(2,j))))
        if i < NUMBER_PIXELS-7: strip.set_pixel(i+7, (0,0,0))
        strip.show()
        sleep(delay)

def draw_rainbow():
    for i in range(0, NUMBER_PIXELS-7):
        strip.set_pixel(i, violet)
        strip.set_pixel(i+1, indigo)
        strip.set_pixel(i+2, blue)
        strip.set_pixel(i+3, green)
        strip.set_pixel(i+4, yellow)
        strip.set_pixel(i+5,orange)
        strip.set_pixel(i+6, red)
        if i > 6: strip.set_pixel(i-7, (0,0,0))
        strip.show()
        sleep(delay)
        strip.set_pixel(i, off)
    for i in range(NUMBER_PIXELS-7, 1, -1):
        strip.set_pixel(i, red)
        strip.set_pixel(i+1, orange)
        strip.set_pixel(i+2, yellow)
        strip.set_pixel(i+3, green)
        strip.set_pixel(i+4, blue)
        strip.set_pixel(i+5, indigo)
        strip.set_pixel(i+6, violet)
        if i < NUMBER_PIXELS-7: strip.set_pixel(i+7, (0,0,0))
        strip.show()
        sleep(delay)

# delay = .031

delay = .06
color_index = 0
while True:
    draw_rainbow()
    draw_eye_7(255,0,0) #red
    draw_eye_7(255,60,0) #orange
    draw_eye_7(255,255,0) # yellow
    draw_eye_7(0,255,0) # green
    draw_eye_7(0,0,255) # b;ie
    draw_eye_7(0,255,255) # cyan
    draw_eye_7(75,30,130) # indigo
    draw_eye_7(255,0,255) # violet
    draw_eye_7(255,255,255) # white

Adding the Cylon Scanner Sounds

You can also add the Cylon eye scanner sound by addint a .wav file to the pico and using the playWave library. This is covered in the Sound and Music Play Audio File lesson of this microsite.

More to Explore

  1. Add a potentiometer to change the speed of the eye scan.
  2. Add a button to cycle through colors of the eye.
  3. Add multiple patterns such as a "comet trail" that has the first pixel brighter and the following pixels dimmer.
  4. Add a PIR motion sensor that will sense motion and get brighter if motion is sensed.
  5. Use the new I2S software to play a sound when the PIR motion sensor has been triggered.
  6. Use an MP3 player such as the DRF0229 to play the cylon sound when motion is detected.
  7. Add an OLED display and buttons to the back of the pumpkin to change the parameters of the display and the sounds.